Showing posts with label Blood Angels. Show all posts

Tuesday, July 2, 2024

23/24 epic league - Blood Angles vs Minervan Tank Legions

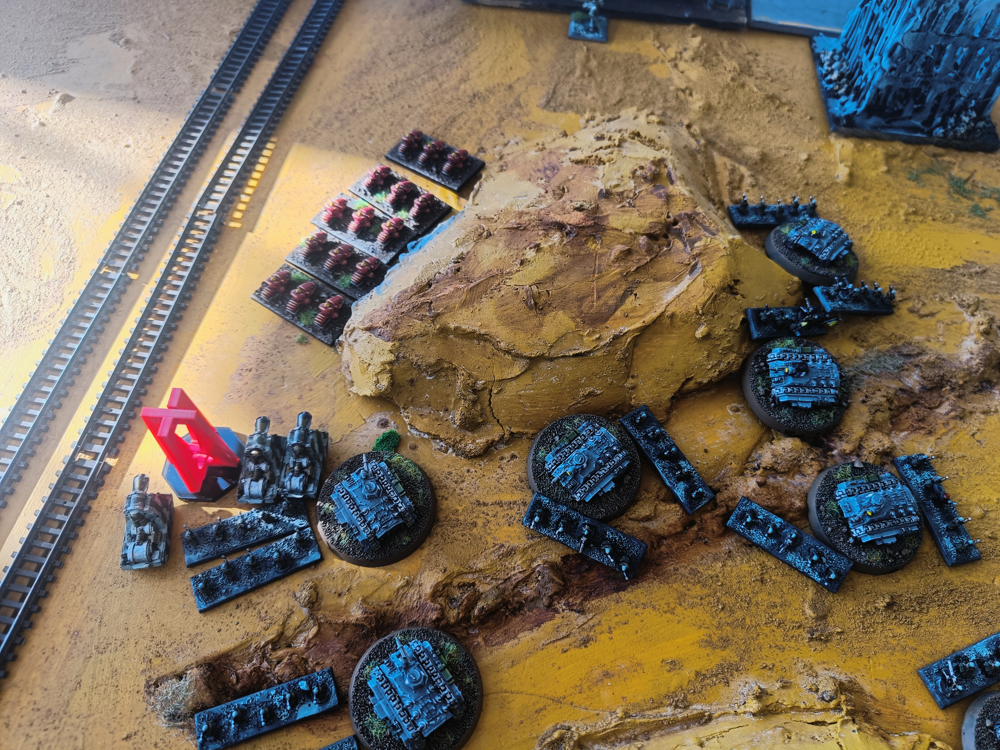
So it's time for round 4. Since we realized that we have distributed the matches wrong and it won't be possible to do two more even rounds we decided to run the last six matches in one round. First out is the top dog Codex Astartes versus the bottom slogger the Minervan Tank Legions. Will the Tank Legions finally be able to scope up a victory or will it just be a walk in the park for the Space marines. 


+++ Codex Astartes TP2018          2000p +++

Tactical Detachment 1                             325
6xTactical, 3xRhino, Chaplain                                        

Tactical Detachment 2                             350
6xTactical, 3xRhino, Hunter                                          

Devastator Detachment                            250
4xDevastator, 2xRhino                                         

Scout Detachment                                 150
4xScout, 2xRhino                                         

Bike Detachment                                  200
5xBike                                          

Land Speeder Detachment                          200
5xLand Speeder                                  

Predator Detachment                              250
4xPredator Annihilator                          

Whirlwind Detachment                             275
4xWhirlwind 


++ Minervan Tank Legion 1995p ++

Small Tank Company                               340
6xLeman Russ Conqueror                          
Armoured Regiment Commissar                     

Small Tank Company                               425
5xLeman Russ                                    
Armoured Regiment Commissar                     
Leman Russ Executioner                          
Salamander Command Vehicle                      

Small Tank Company                               330
5xLeman Russ Exterminator                       
Armoured Regiment Commissar                     
Leman Russ Thunderer                            

Small Tank Company                               400
5xLeman Russ Demolisher                         
Armoured Regiment Commissar                     
Leman Russ Executioner                          

Salamander Scout Platoon                         100
3xSalamander Scout                              

Thunderbolt Squadron                             150
2xThunderbolt Fighter-Bomber                    

Marauder Squadron                                250
2xMarauder Bomber         


The Space Marines choose to set up with the city going as an axis from their side to the Minervans giving them a path with cover. They put their blitz objective behind the park. Rest close to the marine side knowing that the Minervan had not much to garrison. The Minervans choose to put their objectives on the left flank where most of the open ground was to be found.

Minerva set up with a strong left and the Exterminators on the right to fight for the objective in the dunes. The Space marines went with a more balanced setup with most anti armor on their right to counter the expected Minervan advance.

+++ TURN 1 +++

========================================================

The Space Marines win the initiative but let the Minervan start moving.

They start with an airstrike by the Marauders against the second tactical detachment. The marine hunter miss and two units of marines and a rhino is destroyed in the explosions.

The first tactical detachment doubles and take position in the ruins on their left. Nothin available to shoot at but a nice position to control the dunes. 

The Minervans continue to send in the aircrafts against the second detachment but one Thunderbolts spiral to the ground hit by the hunters rocket and the remining one fail to do any damage. 

The Marine bikes march forward full speed and hide behind the ruins in the center.

The Minervan Salamanders sustain fire at the scouts hiding in the nearby ruin but to no result.

The battered second detachment fail to activate and decide to regroup.

On the Minervan side the tanks finally start to rumble forward. The Exterminator company advance forward and fire at first detachment. They are lucky an even if most shots fall short they manage to destroy two Rhinos and a unit of marines.

To protect the flank the Landspeeders zoom forward through the dust and rubbles from the Minervan attack and fire back on the Exterminators but only one of the meltas manage to hit and it fail to penetrate the tanks' reinforced armor.

Knowing how dangerous the fragile Landspeeders nevertheless can be against tanks the Demolisher Company doubles to that flank and attack them. Even thou several close shots the nimble speeders show to be a hard target to lock on and no damage done.

Lacking soft targets to fire on the scouts remain in overwatch.

On the Minervan left flank the fast Conquers advance forward and get into range of the bikes that has to zig-zag between falling shells succeeding to take no damage.

The Devastators double and takes position on the bridge on the marine right. They have no target now but will be able to fire at any that tries to take the objectives on the grounds below them.

The Russ Company having long range battle cannons sustain fire at the devastators and the bridge prove to not be a adequate protection killing two units. 

The Whirlwinds sustain fire at the Salamanders destroying one of them and breaking the unit.

The Predators doble forward hiding behind the central ruins thereby also have no targets to fire at.

End: All Marine units rallies. The Salamander scouts and the Exterminators however fails on the Minervan side.


+++ Turn 2 +++
======================================================

The Space Marines wins the initiative and let the Landspeeders skimmer over the Exterminators firing as the pass by to then hide behind some dunes destroying one tank in the process.

The Minervans continue their airstrikes. This time against the Predators and Bikes hiding in the center. The Marauders destroy two bikes and blow up a Predator while successfully dodging the Hunters missiles.

The battered Predators advance and fire at the Exterminators but the tanks thick armor prove to be to hard for the lasercannons.

The Space Marines, however, decide to retain the initiative and let the first detachment advance into range of the Exterminators. They also fail do do any damage but the sheer amount of incoming fire break the Exterminator company and they retreat.

In the center the Conquers double to get within range of the Predators fending of some small arms overwatch fire from the scouts. They manage to destroy one Predator breaking the unit.

On their overlook position on the bridge the Devastators take the opportunity to fire at the Conquers below but did not manage to hit any of the tanks.

The lone surviving Thunderbolt manage to get into the air and attack the Landspeeders out of range of the Hunter but do not manage to damage them.

The Whirlwinds let loose of their rockets at the Conquer company. One tank is hit by a rocket but take no serous damage.

The Russ Company advance toward the Minervan right flank and try to dislodge the Landspeeders. However they do not manage to get a clean shot on the nimble crafts.

The regrouped second company double forward, full speed, to the center and fire at the Conquers. They fail to do any damage but get within fire support position and control of an objective.

In a third attempt to deal with the Landspeeders the Demolisher company advance and also fire at them and their short range high explosive shells show to be to hard to dodge and three crafts crash to the ground riddled with shrapnel.

In the center the beaten Bike company decide to do a Hail Mary and Engage the Conquers. The thickly armored tanks are hard to carve up with chainsaws but still one is destroyed at the loss of one unit of bikes. Another two tanks are destroyed by the support fire from the second company.
However in the end the tanks numbers and the courage of their commissar weight over and the Bikes loose a close combat and retreats. But the tanks are also so battered that the unit break and retreat back to the Minervan lines.

End: The Salamander and the Exterminators Rallies for the Minervan on the Space Marine side does all units rally except the battered bikes.

+++ TURN 3 +++
=======================================================

The Space Marines wins the initiative again but let the Minervan start, trying to drain their activations.

The Minervans does a classic and calls in the Marauders that once again manage to avoid the Hunter but they are probably a bit stressed since all bombs miss the second detachment. 

The first detachment sustain fire at the nearby Demolisher company but even thou several shell hits they are all saved by the thick tank armor.

The Russ Company advance and fire at the second detachment that protect an objective and destroy one Rhino and the ineffective Hunter.

The decimated Landspeeders advance and fire at the Demolisher Company but fail to hit.

The Exterminators take a gamble and double into the ruins and loose two tanks to the rubbles almost breaking them. The lone operating tank fire at the second detachment manage to kill three units of marines and a Rhino. Breaking them.

The scouts move out of their cover and double to the other ruin taking control of the marine center objective. Throwing some more fire at the battered Conquer Company breaking them.

The Thunderbolt makes a ground attack against second detachment in a small hope to destroy them but only manage to destroy one unit.

The Predators march across the field taking position on the bridge and protect the rightmost objective.

The Demolisher company advance to take control of the Minervan rightmost objective. They fire at the first company but fail to do any damage.

As a response the Whirlewinds fire their rockets at the Demolishers but at no avail.

The Salamanders double forward to contest the central objective and manage to destroy the second detachment to the last man earning the Minervans a victory condition.

Just to seconds later getting hit by rockets from the Devastators on the bridge just to break and retreat away from the objective.

END Space Marines 2 (DFT & TSNP) Minervans 1 (BTS)

Not quite a walk in the park but still a rather definitive victory for the Space Marines bringing them up to the top of the table and Minervans still in the bottom. As so many times before it is mainly the lack of activations in the last round that prevent the Minervans to defend themself and protect the objectives.

Tuesday, January 16, 2024

23/24 Epic League - Space Marines vs Blood Axes


Some free time during Christmas and finally another game played.
This time it's the two mobile forces of the Space marines and the helicopter carried Blood Axes that face of in a game of maneuver.

+++ Codex Astartes TP2018          2000p +++

Tactical Detachment 1                             325
6xTactical, 3xRhino, Chaplain                                        

Tactical Detachment 2                             350
6xTactical, 3xRhino, Hunter                                          

Devastator Detachment                            250
4xDevastator, 2xRhino                                         

Scout Detachment                                 150
4xScout, 2xRhino                                         

Bike Detachment                                  200
5xBike                                          

Land Speeder Detachment                          200
5xLand Speeder                                  

Predator Detachment                              250
4xPredator Annihilator                          

Whirlwind Detachment                             275
4xWhirlwind 

+++ Blood Axe Morkrump’s Korpss Ork Army 1990p +++

Warband                                          340
2xNobz, 6xBoyz, 2xGrotz, 4xBattlewagon, Warlord                                         

Stormboyz Warhorde                               150
6xStormboyz                                     

Kommandos Squad A                                 275
6xKommandos, Big Kopta

Kommandos Squad B                                 275
6xKommandos, Big Kopta

Kommandos Squad C                                 275
6xKommandos, Big Kopta                                    

Blitz Brigade                                    225
4xDeth Kopta, 2xSkorcha, Warbuggy                                        

Big Blitz Brigade                                250
2xFlakwagon, 6xLobbawagon                                    

Bommer                                           200    


The space marines got to choose the edge. The choose to start so the ruins would make a path with cover from one edge to the other. At the same time they placed most objectives in the open on the right flank figure they would be more persistent in the open than the kommandos. The orks did the same leaving the other flank without objectives. 

The marines put the scouts in the tall building in the center while the orks put one kommando unit in the central big ruin and another in the park. Keeping the last and set it up with the others in the main line not daring to set up any kommandos in the rocks near the objectives on the left flank.

The Space marines meanwhile set up with strong right flank and fast moving units on left. Expecting a hard fight in the open desert. 


+++ Turn 1 +++
===================================================================

The Space marines wins the initiative but let the orks move first.
The orks Bommer dare a bomb run on the attack bikes. Hunter miss the bommer but the bommer does not and destroy 3 bikes. Breaking them.

First tactical detachment double forward to occupy the center, fire at orks in big ruin but miss. They hope to drag out some potential ork targets.

Kommando squad A sustain fire back. Got lucky and kill one marine.

Devastator load up in the rhinos and advance to hide behind a tall building.

Stormboyz double. Hide in the big ruin on the Space marine side.

As a response the Space marines landspeeder advance and fire at Stormboyz. Two sixes rolled and two boyz turn to ashes. Breaking them.

But it was a trap. The kopta brigade double and attacks the speeders. Tree speeders crash to the ground and they too are broken.

The whirlwind feels a bit scared and let the rockets loose at the koptas. One buggy and one Skorcha wrecked.

Ork take advantage of the power vacuum on their right flank and double kommando squad C there.

Predators double and hide behind the bridge. Despite not having any targets but preparing for next round.

Kommando squad B in the park stays in the park with a double.

Second tactical detachment also double and hide behind the other bridge pillar. No targets to fire at but it has the objectives in range for the next round.

Big blitz advance (with with a reroll) fire at tac 1 and got the scouts under the template too. Bad rolling and only kill one space marine.

The scouts remain on overwatch.

The warband hold back in the rear waiting for a good target.

End: Bommer get extra BM due to exiting on the wrong edge. All unit but the landspeeders rally

++ TURN 2 +++
==============================================================


The Space marines wins the initiative and let the Predators advance to a nice fire position and let loose a hailstorm of las fire on the big blitz brigade, destroying half of them. The broken tank company scurry back and hide behind the park.

On the other corner of the battlefield does the Kopta brigade double and gets into range of the Whirlwinds. Destroying one.

This force a reaction from the space marines seeing that their blitz are vulnerable. The Devastators advance back and disembark to fire at the koptas but Mork are with the orks and all missiles miss the agile vehicles.

Kommando squad A advanced slightly in the ruin so they all got in range of tactical detachment 1. Killing one marine.

The first detachment sustain fire back. But the ruins protect the orks from the hail of bolter bullets and they take no damage

Kommando squad B advance (with a reroll) to the other side of the park bringing them in range of the predators. The ork big shootas is however not enough to penetrate the tanks armor.

The Scout double back to help protect the blitz objective and fire at the koptas but the rush and the intervening terrain cause them to miss.

The orks decide to do the same and the now decimated Stormboyz double back to the bridge and secure the ork Blitz.

The Space marine bikes marshal and move up the field to support the first detachment.

On the ork flank does the Kommando squad C a swift double and enter the ruin just in front of the Whirlwinds. Destroying them and putting even more pressure on the Space marine blitz objective

Tactical detachment 2 consider falling back but choose offense. Enter the bridge and fire at kommando squad B. Hoping to setting up a supremacy over the objectives in the desert. But the walls and the thick bushes in the park protects the orks from any damage.

The ork Bommer hit the Devestators. Hunter miss again. The ork bombs kills one units of the devastators and a destroys a rhino as well as one of the nearby landspeeders, thereby wiping out the broken formation. 

The ork Warband double and is now in middle of field just opposite detachment 1. Killing one marine and threatening the control of the nearby objective.

End: The Stormboyz and the kopta brigade rally. Big blitz brigade still broken. For the Space marines does the Predators and Tactical detachment 1 rally but not the devastators and the scouts  that need it the most.

+++ TURN 3 +++
====================================================================


The Space Marines win the initiativ again. Fearing an engagement from the Warband they decide to let the Second Tactical Detachment sustain fire, pouring in lead over the orks. Still only killing one ork and a unit of grots.

The Bommer roars again over the field untouched by the Hunter. This time letting the bombs fall over the scouts. To the space marines relief no damage done.

The Space marines continue to try to reduce the Warbands combat effectivity and let the first detachment sustain fire too. Killing another unit of orks.

The ork Kopta brigade try to advance but fail and do a Hold and move forward to control the Space Marine blitz. 

The Scout decide that the Kommando squad C is the most dangerous foe and sustain fire at them killing one unit.

The Kommando squad B have to Hold and fire at the Predators again without any result. 

Devastators advance and fire at the kopta brigade and contest the blitz objective. They hit but it is saved. 

Kommando squad C engage the Devastators. Destroy them all in the first round. Lose one kommando. And no support fire possible

The Space marines try to push home the advance on their right flank and let the Predators advance and spread out between the objectives to control both objectives in the desert. They Fire all their lascannons at warband that by pure luck gets away with only one destroyed battlewaggon.

Kommando squad A leave the central ruin and engage the Predators. First it looks OK for the Space marines but the result of the support fire from kommando squad B seals the Predators fate. And with that the Space marines control of the orks side of the battle field.

The Space marines let their bikes Bikes double back and contest their blitz.

But it has all been in vain. The Warband had never intended to engage the first detachment. It was only a cunning plan by the ork commander to draw the space marine fire into his most robust unit. Instead they double back and take control over the third objective on the orks side of the field..

End:  Space Marines 0 - Blood Axes 2 (DTF & TSNP)


The ork warlord manage to execute a brutally cunning plan and out maneuverable the maneuverable Space Marines. He managed to transfix the big dangerous tactical space marine units in the center while having the more mobile kommando squads wrecking havoc up and down the battlefield constantly forcing the Space Marine player to react instead of act.

Sunday, September 3, 2023

23/24 Epic League - Space Marines Vs Bad Moons


Time for the first match of the second round. This time it is the Space marines that face the Bad moons. Two armies with one victory each in the baggage fighting to retain that top position.

+++ Codex Astartes TP2018          2000p +++

Tactical Detachment 1                             325
6xTactical, 3xRhino, Chaplain                                        

Tactical Detachment 2                             350
6xTactical, 3xRhino, Hunter                                          

Devastator Detachment                            250
4xDevastator, 2xRhino                                         

Scout Detachment                                 150
4xScout, 2xRhino                                         

Bike Detachment                                  200
5xBike                                          

Land Speeder Detachment                          200
5xLand Speeder                                  

Predator Detachment                              250
4xPredator Annihilator                          

Whirlwind Detachment                             275
4xWhirlwind 


++ Ghazgkhull Thraka's Warhorde 1995p ++

Ork Warband                                      340
2xNobz, 6xBoyz, 2xGrotz, Battlefortress, Warlord, Skorcha                                         

Big Ork Warband                                  550
4xNobz, 12xBoyz, 4xGrotz, 8xBattlewagon                                   

Blitz Brigade                                    325
Flakwagon, 3xGunwagon, Gunfortress, Oddboy with Zap                                 

Big Blitz Brigade                                300
2xFlakwagon, 6xGunwagon, Oddboy with Zap                                 

Mekboy Stompamob                                 330
3xCrusha Stompa, 3xDreadnought                                   

Fighta Squadron                                  150
3xFighta- Bommer     

The Space Marines get to choose starting edge and decided to play with the ruins in middle. Going with the edge with more houses. Scouts garrison the tall building. Space marines setup a balanced line with the Tac 2 that has the hunter in center for AA cover while the orks focus on their left where both most objectives are and most open ground for their tanks. Leaving the objective on the right guarded single handed by the stompas.


+++TURN 1 +++
============================================================


The Space Marines wins the initiative and let the orks start.

Big mob double in to big ruin, getting good cover. Fire at the scouts in cover, needs 8:s to hit. All miss.

Landspeeder advance, hide behind the park on marines left

Fighta Bommas braves the hunter and do a ground attack on the whirlwinds. Hunter miss but the fighta bommas does not. Destroys 2 whirlwinds.

The space marine devastators double. Hide in ruins and fire at stompas. Destroy 1 dread. Stompas on overwatch fire back, destroy 1 rhino.

The small blitz brigade double to center of the board and fire at Tac 2. Destroy a rhino.

The Predators respond by advancing and fire back. Destroying the flakwaggoin and two gunwaggons incluinding the wierdboy tower and damage the gunfortress, breaking them.

Big blitz double on the ork left flank, fire at the scouts. One of the scout groups is fried in green fire from the wyrdboy tower. Another blasted by a lucky shell from a tank.

 Tac 1 double and hide behind a ruin to the space marine right.

The small warband double to ruin in middle close to the scouts that fire on overwatch but miss the orks that had the advantage of cover. The orks are a bit more lucky and kill one scout unit, breaking them.

Tac 2 double and hides in ruins in the center. Fire at small warband. Kill 1 ork.

The orks are out of activations. The Bikes march to opposing flank to strengthen it against the coming orks.

The surviving whirlwinds fire at the big blitz brigade but fail to do any damage.

End: All Space Marines but the scouts rally. Big bliz brigade and Small warband rally. Small blitz brigade remins broken.

+++TURN2+++
==========================================================

The Space Marines wins the initiative

Tac 1 advance and fire at big blitz brigade. Destroy one flakwaggon and one gunwaggon

They then retain and let the Bikes engage the big blitz brigade. Destroy 3 in the charge but loose one bike to supportive fire from the big warband. Nevertheless win the fight and destroy the rest of the tanks in the rout. 

The small warband tries the improbable and sustain fire (and succeeds) at tac 2. Yet only 1 shot hits.

Meanwhile on the space marine left flank the devastators also sustain fire but on the stompas. Orks got some luck back and only one shell hit, destroying a dreadnought. It is however enough to break them. Driving them of the objective leaving it undefended.


The fighta bommers does a ground assault against the land speeders. Hunter hits but it is saved. Karma is returned when the fighta bommers miss all their shots.

The Predators advance and fire at the battlefortress belonging to the small warband. 4 hits, all saved? Orks are lucky again.

The big warband tries a sustain fire at the bikes, but fails. Do a Hold fire instead. 20 dice thrown all miss. 

The land speeders double to take control of the objective the stompas just left and fire at the broken stompas. Miss all but another dread destroyed Orks out of activation

Whirlwinds fire at small warband. Kill one ork and damage the fortress.

Tac 2 sustain fire at the small warband. 2 hits both saved thanks to the ruins.

End: Scout and bike rallies. Stompa & small blitz fail to rally.


+++TURN 3+++
========================================================

Orks now only has two unbroken formations, but they are big. Space marines has a clear tactical advantage

Orks win initiative. With so few formations left it is a mixed blessing.

They choose to go first nevertheless and call in the fighta bommas that ground attack Tac 2 managing to destroy 2 rhinos.

Ork retain and the Small warband engage Tac 2. Some bad rolling result in no dead space marines but with some luck in the resolution they still win by 2 in exchange for one lost ork and a damage on the fortress.

Bikes double and now control the ork blitz objective forcing ork to choose between defending or attacking. Big warband feel forced to double back to defend the blitz. 36 dice thrown 2 hits just 1 bike destroyed.

Field is now free for the space marines. The devastators advance fire at small warband but fail to do any damage.

The land speeders advance fire at the stompas. Wipe them out

Predators do a sustain fire at the small warband targeting the fortress and destroy it. They are now just one blastmarker from breaking.

The whirlwinds decide to finish it of. Kill one nob and one boy. Breaking them.

Tac 1 holding the objective on the space marine right realize that they can't do anything more of substance and fire a few pot shots at the big warband that all miss.

End: SM 2 (DTF and TSNP) orks 0.


Classic victory by the space marines first outmaneuver the orks picking off the small formations to then out activate them in the last round giving the orks no possibility to respond to the fast space marines.


Saturday, July 29, 2023

23/24 Epic League - Codex Astartes vs Steel Legion

First of in the 23/24 Epic league is the Codex Astartes in form of Blood Angles vs Steel Legions.

This was the lists that was used.

+++ Codex Astartes TP2018          2000p +++

Tactical Detachment 1                             325

6xTactical, 3xRhino, Chaplain                                        

Tactical Detachment 2                             350

6xTactical, 3xRhino, Hunter                                          

Devastator Detachment                            250

4xDevastator, 2xRhino                                         

 Scout Detachment                                 150

4xScout, 2xRhino                                         

Bike Detachment                                  200

5xBike                                          

Land Speeder Detachment                          200

5xLand Speeder                                  

Predator Detachment                              250

4xPredator Annihilator                          

Whirlwind Detachment                             275

4xWhirlwind 


+++ Steel Legion TP2018            1975p +++

Mechanised Infantry Company 1                      400
Imperial Guard Commander, 12xImperial Guard Infantry, 7xChimera, Commissar                                   

Mechanised Infantry Company 2                     500
Imperial Guard Commander, 12xImperial Guard Infantry, 7xChimera, 3xHellhound, Commissar                       
Rough Rider Platoon                              150
6xRough Riders, Commissar                                       

Artillery Battery                                250
3xBasilisk, Commissar                                       

Sentinel Squadron                                100
4xSentinel                                      

Warhound Titan                                   275
Warhound Titan                                  

2x Thunderbolt Squadron                             300
2xThunderbolt Fighter-Bomber                    


The battlefield was the hot outskirts of the ruined city of Nolus Minorus. A small city in the Angebergus eastern desert if it was not for that it happens to have the only source of water for several days march.

The Blood Angles had the highest initiative an decided to deploy in the ruins of Nolus Minorus. They deployed Tac Company 2 in the middle to have the hunter cover the entire army. It deployed the other tactical company to the left to protect the marine objektives and the devastators and the fast troops on the right to capture the Steel Legion objectives. 

The steel legions put their mechanized companies on the flanks the the rest of the troops in the middle.


+++ Turn 1 +++
===================================================
Unsurprisingly did the marines win the initiative but choose for the Steel Legion to go first due to lack of targets.

The Steel Legions started with a barrage against the Tac 2 Company. Killing one of the marines.

The Blood Angles decided to take the center bridge and choose to double up their predators. With not much to fire on they put a blast marker on the Rough Riders.

The Steel Legion sees an opening in the marines air cover with the Hunter suppressed they manage to sneak in a Thunderbolt squadron on the marines right flank and fire at the devastators destroying both their rhinos severely limiting their mobility.

The marins realize their mistake and marshal the Tac 2 company to get the Hunter back in operation. And move the hunter so in no longer is at the far back. 

The Rough Riders decide do contest the bridge and move toward the predators. 

On the marine right flank the bikes march up and hide behind a hill close to the Steel Legion objective.

This temp the Steel Legion to move up the Mech 2 company and hopefully fry the bikes with its Hellhounds. Unfortunately only one marine biker is killed by the flames.

The devastators double through the ruined park and fire at the Mech 2 company killing one Hellhound.

The Warhound join the fight on the bridge and utterly rips the predators to pieces with its Plasma cannon. Destroying three of them. The remaining breaks and hide far back at the marine lines.


But the marine player has a plan. The Landspeeders double up and get the Mech 2 company in a cross fire. However only one measly infantry is killed.

With the hunter moved to the side of the Tac 2 company it open up a fire free zone on the marine left flank that the other Thunderbolt squadron utilize to bomb the Tac 1 company. But they only manage to destroy one Rhino.

The central scouts decided that the do more use as a determent than move out in the open and stays on overwatch.

The likewise central Sentinels fail their activation and only manage a potshot at the bikes with no result.

The leftmost Tac 2 company move up a little and fortify them self in a ruin overlooking the big empty desert where the marine objectives are.

The Steel legion does not feel to move into this are just yet with both the scouts and tactical marines in an advantage position in the ruins on the other side and decide to just hold back.

Finally the Whirlwinds of the marines fire their barrage at the Mech 2 company that had been lured forward by the bikes. Killing one chimera and one infanteri and starting to stack up blast markers.

In the end phase most formations manage their rallying except the Mech 2 company that ends up keeping a big stack of blast markers. One of the Thunderbolts on the marine right was also shoot down by the Hunter while exiting the board.

+++ Turn 2 +++
=======================================================
 
The marines won the initiative and this time choose to go first.


They start with the Whirlwinds fire at the Mech 2 company killing another 2 infantry.
Then they retain the initiative and charge the mech 2 company with the bikers. Locking the dangerous Hellhounds in close combat and having the Landspeeders with supporting fire. The marines had hope that some of the opponents grunt would not make it to fire fight distance but in the end only one did not got close enough. Making it a really tight affair that took two rounds of fighting to resolve. In the end the marines came out on top breaking the Mech 2 company and only loosing two bikes in the process.


The Steel legion strikes back with a barrage against the Tac 2 company hoping to silence the Hunter but only manage to kill one marine.

The Blood Angles see the opportunity to break the opponents spirit and chase after the routing Mech 2 company with his landspeeders. Killing five more units. Leaving it at just 4 left.

The Warhound tries to retaliate but with the plasma gun on cool down it only kill one landspeeder.

The lone surviving predator double up to support the now pretty lonely bikes in holding the objective.

The 2nd thunderbolt squadron had to stand down.

The Tac 2 Company advance to challenge the Rough Riders on the bridge but the emperor is not with them and all shoots miss.

The 1th thunderbolt squadron that now only consist of one plane unsurprisingly has to stand down.

The Scouts in the center decide that they do most use by stay on overwatch.

The Sentinels again fail the activation but this time manage to kill one bike and finally break them.

The devastators also fail their activation and decide to move out in the open with most targets eliminated on the marine right.

The Mech 1 Company Advance prepare so they are in range of the marine objective for next round.

The Tac 1 company sustain fire at them but does not manage to do any damage.

In the end phase does Mec 2 company rally but the lone bike fails.

+++ Turn 3 +++
===========================================================

The marines win the initiative again.


They try to finish of the Mech 2 company with the landspeeder but only manage to kill one of them and break them again.

The basisilsk sustain fire at the Tac 2 company and really hit home. Killing 3 marines and one Rhino.

The Tac 2 company realize that they are in danger and Marsal while firing at the Rough Riders that are uncomfortable close but miss them.

The 1st thunderbolt squadron tries to ground attack the predator but the last plane is shot down by the Hunter.

The predator sustain fire at the Sentinels but only manage to kill one.

The Warhound double. Leaving the guarding of the bridge and move up to contest the marine objectives. Fire at the Landspeeders and killing two of them.

The devastators double towards the warhound and also make it into the Steel Legion half of the board. They manage to knock one void shield of the war engine.

The Sentinels again fail to active. They move slightly to protect the other marine objective on the bridge.

The Scouts expect a Steel Legion move in the open desert and stays on overwatch.

The rough riders rush down from the bridge and charge into the Tac 2 company at the foot of the bridge. Everything goes the horsemens way and only one Rhino survives.

The whirlwind choose to fire at the Mec 1 company instead of the recently successfully Rough Riders. Destroying one Chimera and killing four infanteri. 

The 2nd thunderbolts stand down.

Tac 1 company choose to leave the security of the ruins and forestall the coming attack of the Steel Legion by occupy one of  the objectives. Throwing a few shots but misses.

The Steel Legion Mec 1 Company finally does its push and takes the other objective while shooting at the Tac 1 company. Killing 2 marines and one Rhino.

The score is at the end of turn 3 
0-0

Most of the formation makes their rally attempt except the Mech 2 company and the Tac 1 company.

+++ Turn 4 +++
======================================================

The marines win the initiative, again.


They start with trying to take out the basilisks with the landspeeders. But with only one landspeeder allowed to fire they miss and just suppress one of the cannons.

However it limit the following barrage from the basilisks at the Tac 1 company and only 1 marine is killed.

The marine player responds with a barrage from the Whirlwinds on the Mech 1 company. Killing 2 chimera and 2 infantry breaking the unit. Things looks grim for the Steel Legions right now.

What else to do than to end with a glorious charge. The Rough Riders charge the Whirlwinds. Wiping them out and is now controlling the Blitz. Suddenly things looks alot better.


The devastators sustain fire at the Warhound finally do some damage. Knocking down the shields and cause one damage.

The Sentinels keep up their trend and fail to active one final time. They stay at the objective.

The predator sustain fire at the warhound cause another damage and breaks it.

The 2nd thunderbolt squadron does a ground attack on the remaining rhino from the Tac 2 company. Killing it now having two victory conditions versus the marines zero. However they have no more formations to activate.

The scouts had to move from their cozy ruins where they have spent the entire battle and advance towards the rough rider that control the blitz. They kill 2. One to little to break them but they now contest the objective.

The marine player try to desperately find a way to get two victory conditions but is not able to reach the Rough Riders wile at the same time control all objectives and chose to remove the Sentinels from their objective and thereby get a  Take and Hold.

The game end 1-1 (Take and Hold vs Break their Sprit)

But the Steel Legions had suffered far bigger losses and the marines is crowned the winners.

The game long looked like a sure victory for the marine player that manage to break both the Steel Legion main companies. But doing so forgot the cheap Rough Riders that killed more then three times their value and almost won the game for the Steel Legions. Over all this was the glass cannons games where both the marine bikes and the Rough Riders hade some really good moments.   


Sunday, November 19, 2017

Training Day


The first company of house Luton trained in the new mobile doctorine have finished their training. After months of training in embarking and dissembarking. How to provide rolling artillery covarge to advancing troop carriers. When to not charge the cavalry headless against the enemy. There is one more baptise in fire to pass. A field training against the Blood Angles. Only after this the troop will be considered ready for battle.

House Luton fighting Death Korps of Krieg style

        Regimental HQ                                    600
            Supreme Commander                               
            19xInfantry                                     
            2xGorgon Siege Transporter                      
            Commissar                                       

        Infantry Company                                 525
            Commander                                       
            19xInfantry                                     
            Commissar                                       
            2xGorgon Siege Transporter with Mortar          

        Death Rider Company                              250
            12xDeath Riders                                 
            Commissar                                       

        Earthshaker Battery                              200
            3xEarthshaker Platform                          
            3xGun Emplacement                               

        Heavy Tank Platoon                               325
            2xMacharius                                     
            Macharius Command Vulcan Mega Bolter            
            Commissar                                       

        Light Support Battery                            200
            4xHeavy Mortar                                  
            4xCentaur   

Blood Angles
        Tactical Detachment                              275
            6xTactical                                      

        Devastator Detachment                            250
            4xDevastator                                    

        Terminator Detachment                            350
            4xTerminator                                    

        Scout Detachment                                 150
            4xScout                                         
            2xRhino                                         

        Land Speeder Detachment                          200
            5xLand Speeder                                  

        Land Raider Detachment                           325
            4xLand Raider                                   

        Whirlwind Detachment                             300
            4xWhirlwind                                     

        Warhound Titan                                   275
            Warhound Titan

The armies deploy on the outside of a ruined village. The battle judgedes take position and the training begins.


Turn1

House Luton wins the roll of but let the Blood Angles go first

The scouts double forward and hides behind some small buildings.

The Earthshakers initiate an artillery duel and sustain fire at the Whirlwinds and neutralising two of them before they have a chance to strike.

This force the Whirlwinds to marshal and move forward to compensate for their short range.

The infantry company double forward in their troop carriers  trying to hide behind the mountain. But they fail. The warhound sees an opening and advance while firing all its weapons on one of the troop carriers. The huge tank rocks back and forth but in the end only one hit is considered to be damaging.

On the other side of the tall mountain doubles the heavy tanks towards the space marine lines finding a line of fire to the scouts hiding behind the buildings. Their long range battle cannons put one unit and a rhino out of action.


The heavy tanks has managed to get exposed to space marine counter attack that comes in the form of the advancing Land Raiders that get clear shoots with their laser cannons. One of the hits is judged so precise that it directly disable one of the tanks.

The light artillery sustain fire at the spotted scouts. A lot of the grenades strikes true and two of the scouts units are out of action and the remaining are considered to be broken.

The devastators double with full speed and fire at the heavy tanks but fail to do any clear hits.

The Luton HQ also double following a path between two hills getting reasonable cover from most Blood Angle units.

The tactical company follow the devastator example and double forward but also fail to do any damage on heavy tanks.

The cavalry on the left flank trots forward at double speed to get into charge range.

Finally the landspeeders zoom forward towards the cavalry, taking out four units of them with their multimeltas.


The scouts and death riders fail to rally. The rest of the units succeeds.


Turn 2


Suddenly in a strange crackling energy sphere a unit of terminators appear behind the Luton lines just beside their heavy artillery.

The space marines immediately takes imitative and the terminators assault the artillery and the whole unit is taken out of action. However the crew of the gun furthest away from the terminators manage to turn the huge gun and fire direct fire right into the terminator company and one unit of the terminators was also disabled. This would be wildly celebrated at the pub later that evening.

The Blood angles try to follow up by deadly fire from the Whirlwinds but the communication failed and they where instead forced to regroup.

The now decimated cavalry company charge the tactical company. But laces are not effective against power armour. Only the front unit of space marines is removed from action while the response fire halt the entire charge. Directly disabling tree units of cavalry. Then the catastrophe hits when the unwieldy unit is trying to turn around and regroup. Horses tripping over each other while the space marines is pounding in bullet after bullet in the mess of horses and men. The entire company is removed except the commissar and his bodyguard who manage to navigate out of reach from the space marines.

The heavy tanks on the other side of the tactical company retains the initiative and are a bit more lucky in their shooting and disable two tactical units.

The warhound remain in place and sustain fire with the megabolter, while the plasma gun is cooling down, at the approaching troop carriers. But none of the hits are considered to be accurate enough to cause any damge.

The Blood angles instead order the Landspeeders to take out the infantry carriers. They advance and cover the side of one of the carriers in deadly melta shoots. But the fortune is on the Luton side since only one of the hits is a penetrating one and the carriers is still in operation.

The infantry commander realise that the carriers won't take more of this and order the men to disembark and engage the land speeders. The hail of las-shoots make sure to ground the Landspeeders for the remainder of the battle.

The tactical company advance and cleavery block the way for the Luton HQ. While the devastators press on trying to take out the remaining heavy tanks but fails.

The Luton HQ has no other choice than to engage the tactical company if they want to be able to continue to advance. The manage to dispatch the company with minimal losses.

Across the field the Land Raiders advance and fire at the heavy tanks. This time damage one of them and the amount of fire is enough now and they break and fall back.

On the Luton right flank the light artillery now alone face the advancing terminators. They fire all they have at them. Manage to disable another unit of them and the terminators are forced to break and retreat.


Scout and Heavy Tanks fail to rally the rest succeed.


Turn 3

The Land Raiders are now having a clear field of fire to a big part of the Luton HQ. They remain in place and sustain fire at them. Almost destroying one of the troop carriers and immobilise it but only manage to disable one infantry unit.

The terminators retain the initiative and advance while fire at the light art. But they are still shaky after just having regrouped and miss all thier shoots.

The Luton infantry company need to press on. They double forward. Unfortunately not being able to reach engage distance of any of the space marines units and instead letting the troop carriers heavier weapons fire at the devastator without doing any damage.

The warhound fire all it has at the remaining cavalry unit that had been put back in order by its commissar. Removing the last traces of horses from the battle.

The light artillery advance to trying to secure the objective while firing at the terminators without doing any damage.

On the space marine left flank the Whirlwinds double forward, securing the objective in the stream. It also fire some rocket on the move at the broken heavy tanks. All miss but the experience of being under fire again breaks one of the tank crews spirit and they evacuate the tank and runs for the hills. They where later severely punished by the tank unit commissar and is no longer a tank crew, instead are they latrine crew for life.

The Luton HQ engage the nearby Land Raiders. Swarming the tanks in close combat firing into hatches and placing grenades on the tracks. One of the Land raiders is imminently ruled out of action and another as it doesn't manage to retreat.

It is now time for the devastator to return fire at the infantry company and they do it with pin point accuracy. Five more units is out of action.

No winning conditions are reached by either side and the battle continues.
The Luton HQ fail to rally the rest succeed.


Turn 4


Sitting safe at the objective at the stream ever since the last cavalry unit was out of the battle the Whirlwind could sustain fire at the infantry company that only is saved by being able to take cover behind the massive troop carriers and only loose three units.

The warhound continue to pour in fire into the infantry company removing another three units. The infantry company is now on the edge of breaking.


But more pressing issues need to be taken care of by house Luton. The regrouped terminators can not be allowed to take control of the rear objective. The light artillery sustain fire at them and manage to disable another unit of terminators breaking them again removing the threat.


The Land Raiders advance to the other side of the small forest fire at the infantry company but fail to do any damage. Nevertheless breaking them and the infantry company flees towards the other forest.

The devastator double forwards in hope of trying to block the Luton HQ and disable one of its infantry units while doing so.

The HQ engage the blocking devastators. They manage to remove one Rhino and three units of them while themself only loosing three units. However the morale of the infantry is low and the rear rows start to retreat, dragging the rest of them with them in a general route. The space marines manage to roll a six on the combat resolution while the HQ only rolled a three having them loose with least possible margin.

With the HQ on the run the battle is over. The scouts advance a bit trying to put a final infantry man out of action but miss.


The victory goes to the space marines. They shall not pass and Take and hold.


The training battle is considered a great success. Only a few casualties on the Luton side most of them happened during the cavalry route. Nobody could expect a group of freshly trained farmest to be able to beat the emperors finest warriors. Except maybe General Almund Garnif that had secretly hoped that his recruits would bring his fortune back to him. Nevertheless they are considered battle worthy and ready to face the orks.

There is a lot to learn of how to handle the slow moving Gorgons and when to march and when to engage. The death riders was a disappointment, the plan of a huge board full of charging cavalry might have to be postponed.